Monday 21 September 2015

Crochet hook roll tutorial


You will need:
Two fat quarters
Thread
Wadding
Ribbon (or a button and elastic)


1) Start by folding one fat quarter in half (whichever one you want to be the main part of the case)
 Cut one quarter of the length off. What is left will form the case. With a second fat quarter, cut two pockets. The first is half the height and half the width of a fat quarter. this is then folded in half as shown below (the left hand piece of checked fabric). The second is just a small rectangle again, folded in half (the right hand piece of checked fabric below). 
*Please note this is not the final position for the small square it was just placed there to show size


2) Fold the large pocket in half (right sides facing) and sew along one short edge.


 3) Check that the height of the small pocket is right for your darning needles. You want enough needle sticking out at the top to grab them when they're in the pockets (See left photo). If the pocket is too deep take a little off the height at this point before sewing. Then fold the small one in half (right sides facing) and sew around the 3 open edges leaving a gap to turn inside out (the gap is more visible in the photo on the right as I used more of a contrasting thread)


4) 
Open out the large fat quarter you are using as your main case. Place the first pocket in the bottom left corner with the stitched edge to the right, pin it in place.


5) Again, check the height is right for your crochet needles. If it's too tall just lower the pocket down the base fabric and leave some hanging off the bottom. you can trim this later once you've sewn along the bottom.


6) While your crochet hook is in place (as above) fold the top of the case over so that it encloses the top of the hook. This will prevent the hooks sliding out once complete. It may help to run the iron over the fold at this point so that you can see where it will be once you've removed the needle again.

7) Next place the small pocket towards the right of the base. With a darning needle in position, ensure that the top of the needle sits just below the fold you made before. If the pocket is too low down, the needles will slip out. Once this cushion is in the correct position, pin it to the main fabric (making sure you only pin it to the top layer not right through both).


8) Open up the base fabric again and stitch around the sides and bottom of the small pocket and down the sides of the large one - the bottom will be sealed when you sew the whole thing together (I know the left hand side would be too but if you do this now it helps with the next step!)


9) Then using the thickness of your hooks as a guide, sew lines down the large pouch at varying intervals to create the individual hook pouches. Then do the same with the small pocket using your darning needles as a guide. I've used the photo of a finished case below (which is a different case) just because you can see more clearly how I did these lines thanks to the contrasting thread!


10) Cut a piece of wadding to the same size as your  base fabric (once it's folded in half).


11) Loosely roll your main fabric and measure a piece of ribbon long enough to go around your rolled up hook case.


12) Fold your fat quarter in half so that the right sides are together (the pockets are on the inside with the small one to the right) Place the ribbon inside, folded in half with the fold lined up with the right-hand edge of the fabric. Where the fold is, pin the ribbon to the edge where my finger is pointing. You may want to tack this on by hand to make it easier when machine sewing the edge.


13) Keeping this orientation, lift the fabric and lay it onto the wadding that you cut before. Pin it and sew around the three open edges being careful to sew over the folded edge of the ribbon but not over any of the rest of the ribbon inside. Make sure you leave a gap to turn it the right way around. Trim off any excess wadding and fabric around the edges and trim the corners.


14) Here's the gap! (see my fingers?)  Turn everything the right way round, making sure you pull all the ribbon through. Then sew up the gap by hand. Fold the top down over where the needles would sit as before and iron it down again to give a need finish. Ta Dah!


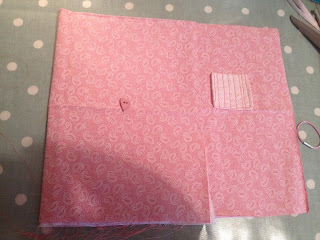
True to form I forgot to take a photo of the finished roll but I do have a photo of one that I made with a button and loop which I will post at the bottom. I have included some instructions for this below too but you would need to use a much stiffer wadding for this method.

Most of the method is the same but just after step 7 (before you open up the base fabric to sew on the pockets) you will need to fold the left side of the case over about 3/4 of the way (as below) and sew a button on half way down the back in the centre of this folded section. The 1/4 on the right will later have the loop attached and will fold inwards to meet the button.


When you come to step 12 where you turn the piece inside out to put the ribbon on, instead place a piece of elastic (or a little hairband as I did!) tied in a loop so that the tied end is at the right hand side and the loop is in between the two sides of fabric. (In the photo I am showing the orientation but I will then slide the loop inside the fabric so it is sandwiched between the two sides. When I turn it the right side out the loop with then be on the outside. Also ignore the fact I've already sewn my edge!)


Ta dah!


I then filled mine with a basic set of hooks, a stitch diagram booklet and a crochet magazine...

...et voila! A lovely little gift for a crochet beginner!


I hope you have enjoyed this tutorial. Let me know if you like this sort of thing or what other things you would enjoy reading blogs about!

Thank you and hope you pop by again soon!

Elizabeth

Saturday 5 September 2015

Return of the MAC


Hello again!

Now, I love a little freebie as much as the next person, but when you can get a freebie for doing something that is also great for the planet, well, who could wish for more?!?!

So you can imagine my excitement when I sorted out my old stash of empty MAC makeup products and discovered I had a grand total of 12 items of packaging!!!!


For those of you who don't understand why I'm getting excited about rubbish, well let me enlighten you! For every 6 items of packaging (ie, compact, lipstick tube, eye shadow pot etc.) that you return to MAC, the lovely people who work there will GIVE you a FREE lipstick!! So the fact that I have 12 means ... you got it... 2 Free lipsticks!! 


I can't wait to go and have a look at their gorgeous colours and claim my 2 freebies! So my friends my advice to you is - don't chuck out your old packages, save them in a little bag in your wardrobe and before you know it, you too will be running back to MAC for your very own freebies and patting yourself on the back for all the good you have done for the planet! 

See you again soon xx

Thursday 3 September 2015

Bye bye babies! :(


So today was the first day of a new school year and I had to send my babies off into the big wide world without me (again!) At the start of the holidays I wondered (like many other parents) how we would get through those long summer weeks. Don't get me wrong, I was looking forward to spending quality time together but, when I was awoken early on that first day off by the sound of bickering, closely followed by 'Muuuuuuuuuum...'(who knew this little word could be dragged out this much?!?!?) followed by: 'he kicked/hit/scratched me', I must confess I was wondering whether I'd make it through!

However, after a few days we all began to unwind from our long school year. Once the children de-stressed  and got their energy back, it turned out that they were really quite lovely (well, most of the time!)  I re-discovered those lovely, sweet, little babies I gave birth to all those years ago!

We had all kinds of fun and frivolity (more about that on a later blog) but we didn't fill everyday with exhausting activity, some days the children asked to stay in their pjs so I obliged (I quite like staying in my pjs all day to be fair!) It's amazing how much fun it can be just to snuggle up and watch DVDs especially with the great British weather being true to form for most of the break!

As we prepared to go back to school in our last days off, it suddenly struck me that I didn't have babies anymore! Joshua is about to turn 7 and Olivia, my baby, is going into Year One!! It's quite scary because, while I was growing up, I always thought I was going to 'have babies' and that would be that. What I didn't realise was just how short a time they are babies for!

So I guess what I am trying to say is that I am so thankful for these holidays, I know not everyone is fortunate enough to be able to spend all the holidays with their children and I am so grateful to have been able to re-connect with them! I am so proud of the people they are becoming and I wish them so much luck in the next step of their journey in life.

Sorry for being soppy! If it helps they were both incredibly grumpy after school and are back to driving me nuts again (but they're still my babies and I did miss them!)

Best wishes to all of you who are sending your babies into the big wide world!

Elizabeth x
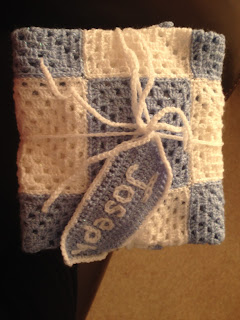
PS. NO - this sadness over my babies growing up does not mean I want another one! I am NOT having any more! (before anyone asks lol!!)


Wednesday 2 September 2015

Crochet creations!

Hello!

Those of you who know me will know how much I LOVE to crochet! I will sit and crochet most evenings while the TV is on in the background, I crochet in the car on long (or sometimes even short) journeys and I will even crochet while sitting in the garden sunbathing (on the rare occasion we get some sun here in England!).

My mum taught me to crochet when I was quite little, just starting me off with making a simple chain but I didn't really progress from there at the time. Once I had my first child I was keen for him to have a special home-made stocking, like the ones my mum had crocheted for me and my sister when we were little, so I asked her to teach me. These were a great way to start as they are made up of Granny Squares which are super-easy to learn and work up quite quickly so it's not long before you are getting results which I find really helps me keep going when I am learning a new skill. One of the reasons I'm not so keen on knitting is that you feel you're working really hard but can't really see any results for ages!

Since making the stockings I have made a few blankets from Granny squares which is so simple as you just join them all together with a darning needle and yarn. I then do a little border either in Double crochet stitches or Trebles.

Here are the bits I've made! Hope you enjoy them. I personally love looking at crocheted bits. They are sooo yummy!


This is a stocking that I made for my friends daughter (after making mine I seemed to get lots of commissions for these from friends!)  The ones my children have are bigger as I made them 4 squares tall (I can't find a photo of them at the moment. I'll take some more this year!)


These are the squares I did to make my own blanket. I used 5 different colours and alternated them to make different squares. I always finished with round 6 in cream (so never used cream on round 5) this meant the blanket would look like it had a cream background. I joined the squares in cream and also used it for the start of the border.


Here it is all finished! So cosy!!


First I tried a scalloped edge...


...but I decided I preferred the shell edge.


I also used Granny Squares to make a blanket for my friend's baby which is so cute!


By this point I was a Granny Square Pro! I decided to give other patterns a go and I am now well and truly hooked (get it?!?!)

I will blog another day about other bits I have done with links to the patterns.

I hope you have all enjoyed all this crochet yumminess! I've got a granny square pattern below for those who want it. Please comment with any suggestions for blogs or anything you would like me to do if you have ideas. Thanks!

Bye for now!

Elizabeth x


The pattern I use for my Granny Squares (for those who crochet) is as follows:

Round 1
-Ch 5 sl st into 1st ch
-ch 3 (counts as first tr)2tr, ch1 3tr, ch1 3tr, ch1 3tr, ch1 sl st into top of ch3.
change colours

Round 2
Starting in a ch space ch3 (counts as 1st tr) 2tr ch 1 3tr ch1, *Then into next chain space 3tr ch1, 3tr ch1
repeat from * twice more then sl st into top of ch 3

Round 3
Starting in a ch sp between the two clusters of trebles from before ch3 (counts as 1st tr)2tr ch 1 3tr ch1,
*Then into next ch sp (the larger space with the cluster from the previous row below it) - 3tr 1ch,
Then into next ch sp  (Between two clusters again) 3tr ch1, 3tr ch1,
Repeat from * twice more
Then into next ch sp (the larger space with the cluster from the previous row below it) - 3tr 1ch,
Then sl stitch into top of ch3

Round 4
Continue to work as before making clusters of 3tr in each ch space and 2 clusters of trebles into the spaces between the previous 2 clusters of trebles (these form the corners to the squares)

Round 5
Continue as in round 4

So these are the squares all sewn together ready to make my stockings. Then I just crocheted a long strip of Treble crochets long enough to go down one side along the bottom, round the toe and up the other side to join the two together.


Please let me know if you find any errors in the pattern! Thanks x