Saturday 14 November 2015

Frozen Fever


If, like me, you have a Disney's 'Frozen' Fan in your home, why not throw them a 'Frozen' themed birthday party? My Daughter wanted one for her 4th birthday party last year. Unfortunately her birthday is in July so we melted a little! Here are a few tips to make your Frozen Party sparkle!


Decorations


-Plan ahead! If (like us) you have a child whose birthday falls outside of the winter months, try to stock up in advance. Now is the perfect time to start planning because at Christmas time the pound shops have loads of great snowy decorations which are just the ticket for decorating your 'Frozen' party room. This frosty wreath would look great on the front door to welcome guests and the icicles look effective around the edges of tables. The paper snowflakes are great to hang around the room and are 3 for £1 (all from Poundland and available at time of blogging)

 
- If you have left it too late and your party is after winter time, never fear! There are plenty of online sites with downloadable decorations for a small price or sometimes even free! www.homeketeers.com have some great frozen party items to download I downloaded a free set and then I paid for some extras. Here is some bunting and a garland I downloaded and printed out (I laminated them too so they'd last longer) :


In the free kit I got: Cupcake toppers, cupcake wrappers, invitations and straw flags. In the add-on kit that I purchased were: Bag toppers, banners (above), cake toppers (large) garlands (above) mini candy bar wrappers, treat boxes and water bottle wrappers (above). this kit cost $1.99 which is about £1.30 so well worth the outlay!  They are definitely worth a look!

Party food


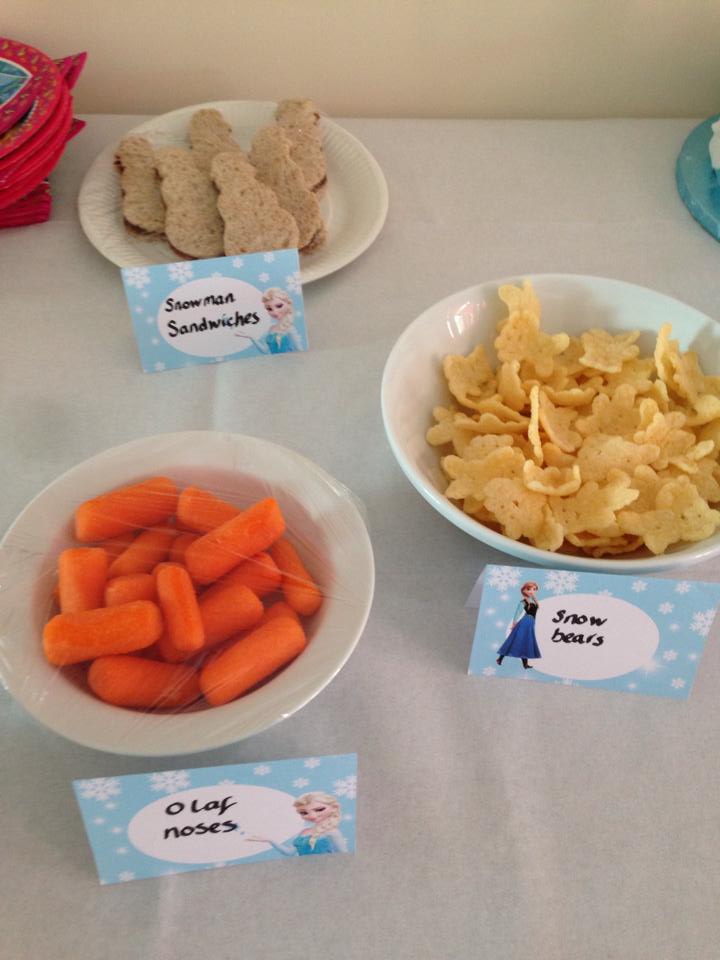
I also downloaded these little labels to give the food fun 'Frozen' names but I can't remember where now! They were probably in one of the kits mentioned above but I can't be sure.
We used pom bears as 'snow bears', Monster Munch as 'Yeti Feet', carrots as 'Olaf Noses', Sponge fingers as 'Anna's Frozen Fingers' and made 'Snowman Sandwiches. You can find many more fun 'Frozen' food ideas on pinterest!
The cupcake toppers above were not the ones in the kit as I had already purchased some from eBay. These ones are printed onto rice paper so they are edible!


Speaking of Pinterest, that's where I found this great idea! Get some Cheesestrings and then, using a black and orange Sharpie, draw Olaf faces at the top and buttons down the middle. The children LOVED these!

Party Games


As well as the usual Musical Statues, Pass the Parcel etc. I decided to do a few 'Frozen' themed party games too!

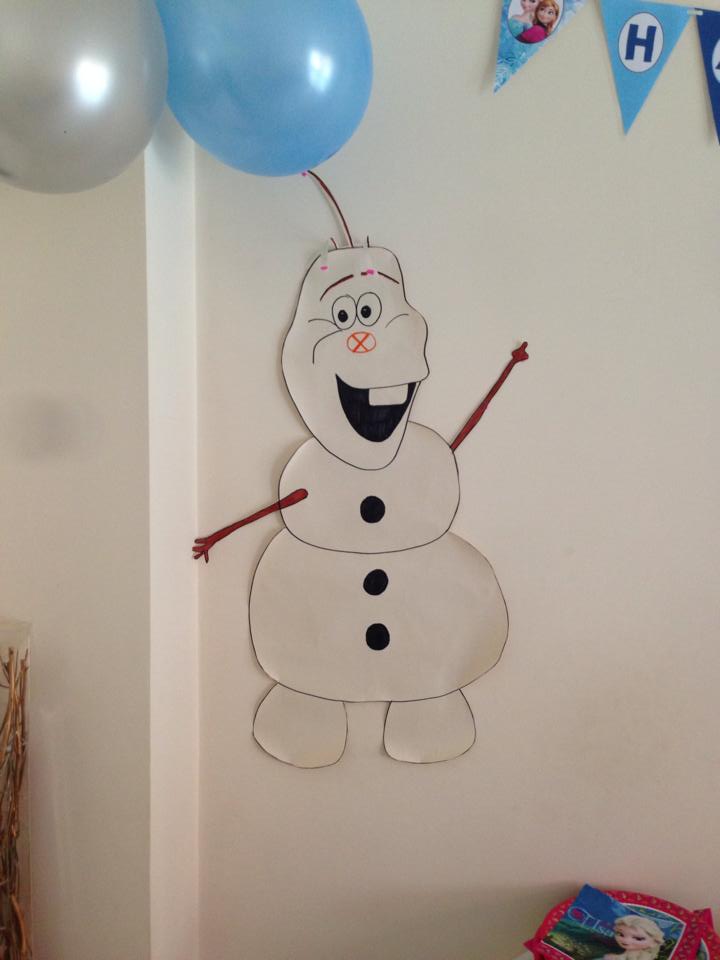
Pin the nose on the Olaf!

I had a large sheet of white sugar paper on which I drew an Olaf without a nose (if art is not your thing you could always print one out and have it blown up on a photocopier). I then drew one nose for each child onto orange card and wrote their names on so we could see whose nose was closest to the spot!

Frozen Fractals


As it was a warm summer's day I thought this idea I had seen at Happy hooligans would be a lot of fun! Visit their page if you want lots of details (and amazing photos) but the general gist is that you fill lots of different shaped ice cube trays and large containers with coloured water and pop them in the freezer. Once frozen turn them out and give them to the children, along with water and brushes. Each child should have one large block of ice (I used food storage containers to freeze these). They then 'paint' water onto the smaller ice shapes and press them onto their large block. As the water freezes between them it sets them in place and the children can create beautiful ice structures!

Party Favours

Personalised chocolate bars


Although I did get candy bar wrappers in the Homeketeers kit I had already ordered pre-wrapped kit-kats from a local seller on ebay. I thought this would take some of the hassle out for me as I would not need to sit and wrap them myself and also they personalised them for me. I no longer have the details of who supplied them but if you search on eBay you are bound to find loads of suppliers near you.  Here they are with a little card I popped into the party bags which was another download from Homeketeers that I laminated as a keepsake for the guests:


Loot Bags


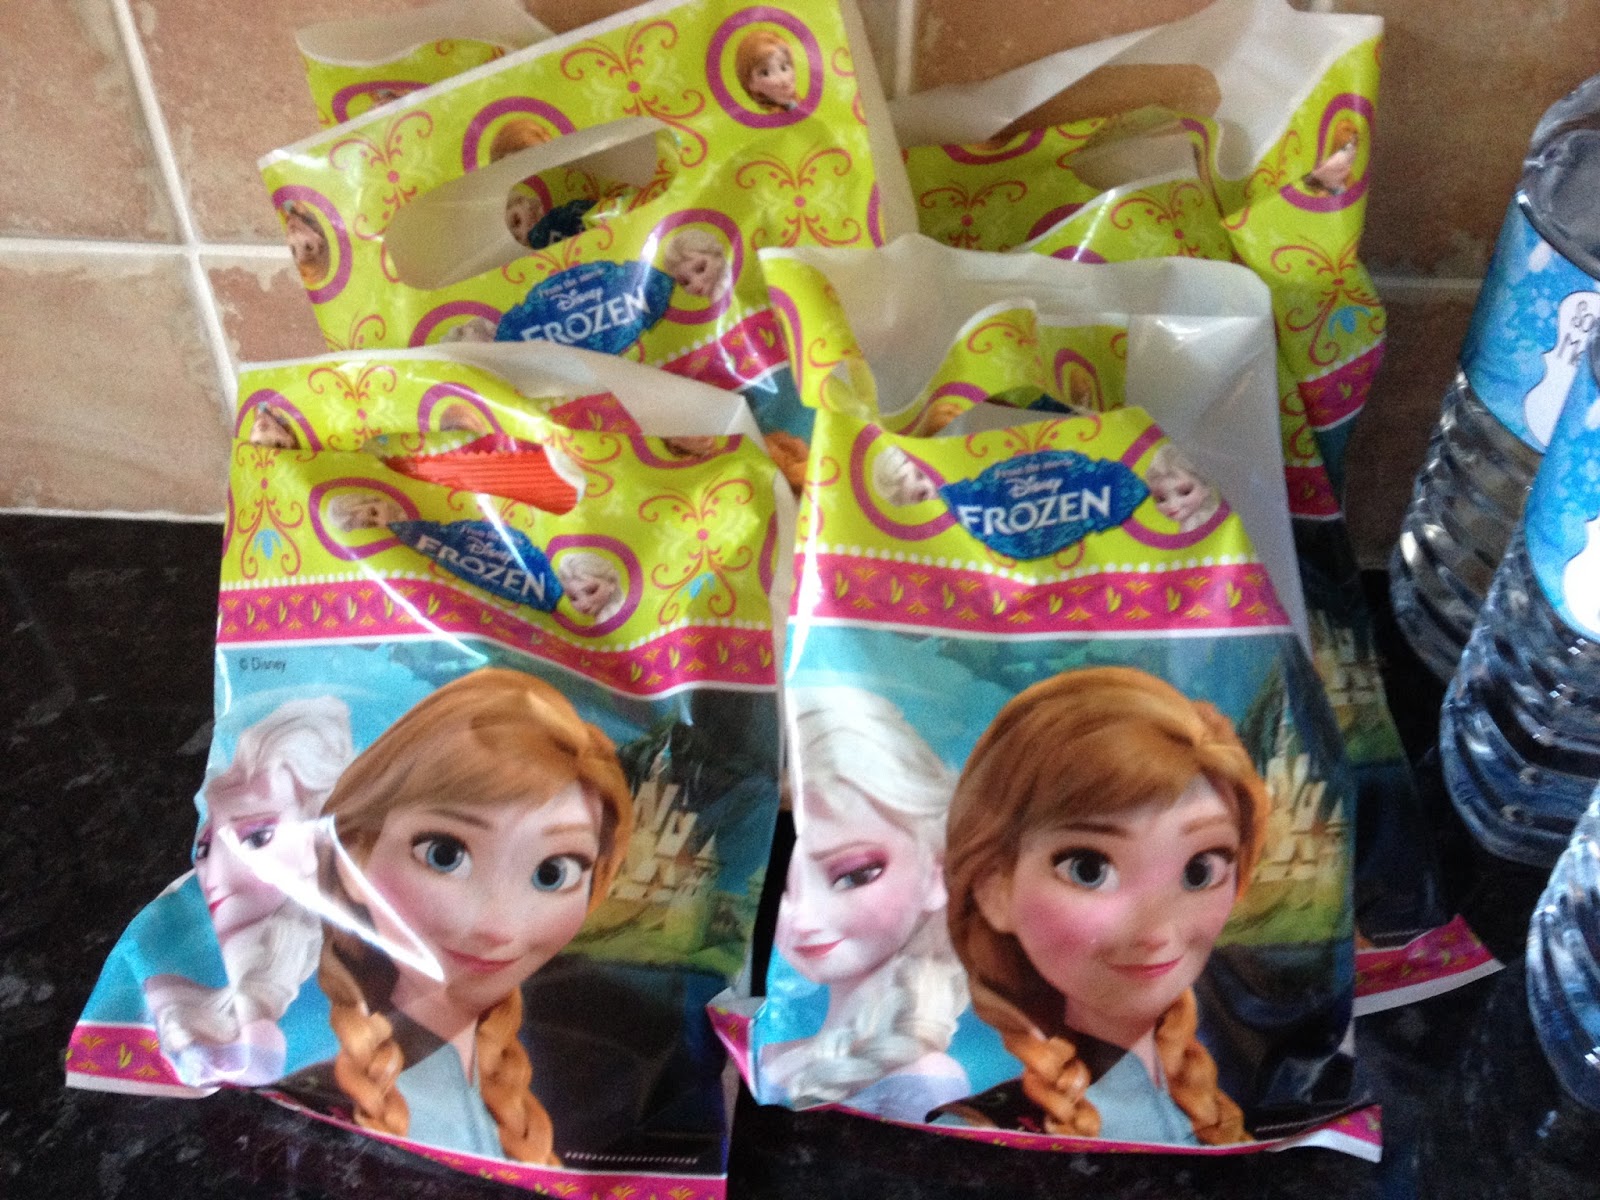
These are always a firm favourite I got these ones on eBay - again! (Apparently I no longer go to actual shops!) I filled them with a few sweets, yo-yos, Frozen pencils and erasers, plastic bangles etc. and of course...

A slice of cake


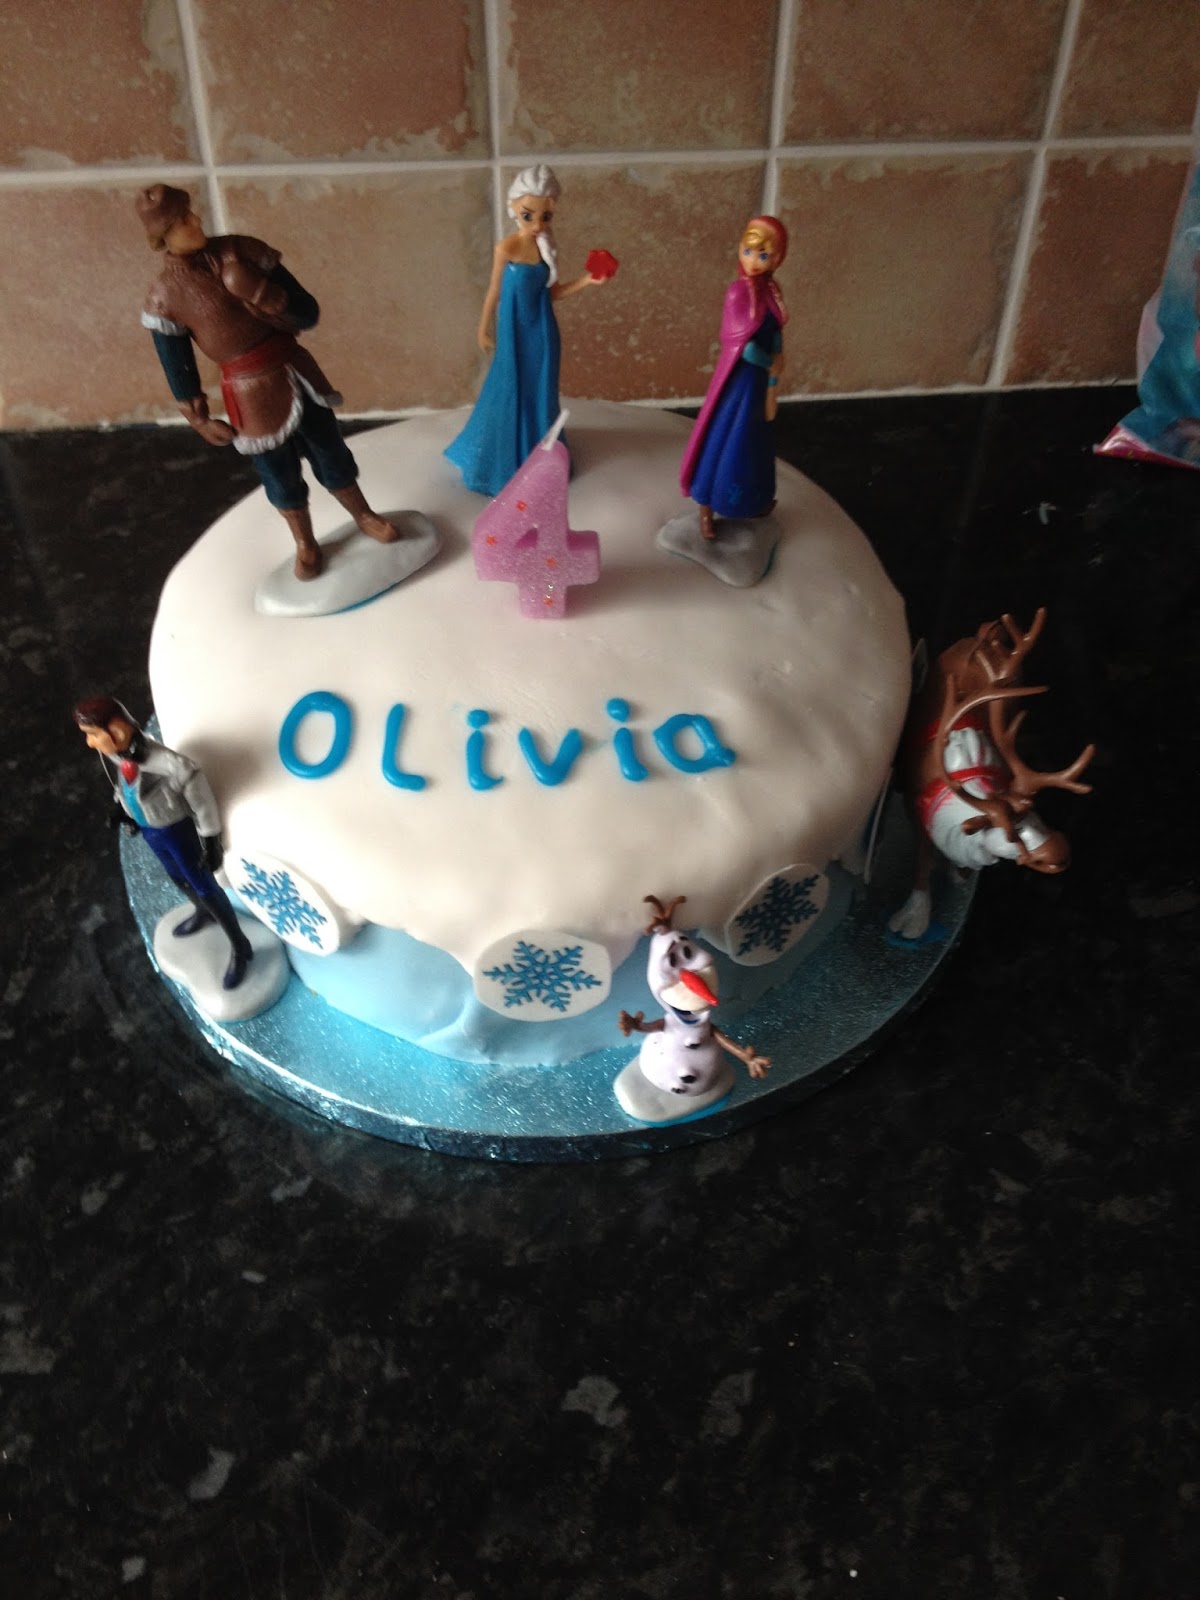
This is my masterpiece! (clearly I'm no pro but I think I did ok for a complete novice!) I made a Victoria Sponge (I like to follow the recipe from Nigella Lawson's 'How to be a Domestic Goddess' as it's really easy and everything just goes in the food processor!) I just put jam between the two sponges. I then rolled out some ready to roll light blue icing and covered the cake in that. Then I rolled out some white ready to roll icing and cut around it in a wavy line so that when I placed it over the blue it looked like snow fall. The figures I bought on eBay (definitely a theme here!) and used a little icing to stick them down. The snowflakes around the edges came on the same sheets of rice paper as the cupcake toppers above. I bought the ready to roll icing and the light blue cake base from Hobbycraft


All in all it was a huge success and the Birthday girl and her guests had so much fun!

Birthday Girl


Just had to include this photo of my niece as she looks soooooo cute in her frozen onesie and tutu! x

If you are planning to do your own Frozen themed party I hope this has inspired you and helped you know where to go for ideas and resources! You can check out my 'Frozen Party' board on Pinterest here. Most of all...Have fun! x


Tuesday 10 November 2015

Guy Fawkes Fun!


Last week we were celebrating Guy Fawkes night! It was actually on Thursday but we watched the big fireworks display on Saturday night because the community centre near our house puts on a huge display so we all just stand outside and have an amazing view! More about that later.

On Wednesday evening my two little nieces came round to play after school. My sister had a migraine so I sent her to have a nap while I got on with some Fireworks painting with the little ones.

First we chose brightly coloured paints (handy hint -add a little pva glue to your paint when using glitter on top as this helps the glitter to stay stuck once the paint dries)

Next we got an assortment of paint brushes and old toothbrushes (another handy hint - add a little water to your paint and pva mix if using toothbrushes as runnier paint makes flicking it a lot easier)

Then I took some black card (A4 size) and cut the edges in a zig-zag fashion to make them look like explosions!


Once we had all those things in place we got started splattering and flicking paint onto the card.


They wanted to use toothbrushes and paintbrushes to just paint flicking lines and star shapes rather than flicking the bristles but that still worked. The littlest niece got in with her fingers, scraping the paint too, which was actually quite effective. Once they were happy with their designs I got them them to sprinkle multi-coloured glitter over the paint and shake the excess into a tray to be tipped back for later use.


Once they were dry I added them to the display with the haunted houses from Halloween all ready for our family Guy Fawkes Night Celebrations!


On the Saturday after Guy Fawkes we had 8 adults and 5 children at my house to watch the fireworks display! Before we went out the little ones had a jacket potato for dinner then all the adults had a Chili with rice so we were well fed and warmed up before going out there!

I then sat the children down and we opened our big packs of glow sticks and made them into necklaces and bracelets. My mum had also brought some along that were wider and hung on lanyards. We didn't do this last year and it was quite hard to spot them all out there on the dark field so this year we were better prepared and they were much easier to keep track of!

Last year we took out hot chocolates with marshmallows to keep us warm out there but I didn't think of it this year. Fortunately my lovely neighbour brought us out some Mulled Wine although the weather was much milder than this time last year so we weren't too cold.

The display was great and the children were mesmerized! Olivia doesn't like the big bangs though so she had her ear muffs on to help with the noise! Plenty of 'oooh's and 'aaah's were had by all! We then met up with our other neighbours and their two girls and we got out the sparklers and talked to the children about sparkler safety and made sure they were all wearing gloves. Everybody had at least two turns (including the big kids!)


Finally it was all back into our house (including the neighbours) for tea and birthday cake as my mum and cousin both have birthdays in the next week. Once the happy birthdays were sung and the cake was eaten the little ones were getting very tired. We said our goodbyes and put them to bed before cleaning up and falling into bed ourselves! Well this year's Guy Fawkes Night certainly went with a bang!


Saturday 31 October 2015

Haunted House Craft with littlies!


With this week being Half Term Holidays and with Halloween arriving at the end of them, I decided that some spooky crafts were in order! These haunted houses are really effective and fun for the kiddies! Here's how we made them.


You will need:

Sheets of black A4 card
Sheets of yellow A4 card or paper
Spooky Stickers
A craft Knife
A craft cutting board or scrap card as a cutting surface
Glue sticks


First have your little one draw the outline of a house with a pointy roof and a wobbly chimney (look at that cheeky face!) :) 


Grown up job! - Once they have added plenty of doors and windows use your craft knife on a board to cut along the bottoms of the windows and down the middle of them so that you can fold them open. Do the same with the doors but make sure you leave one side edge uncut so that it acts as a hinge.

Next get the children to add glue along the edges of the house (taking care not to get any on the backs of the doors or windows). Then place the house on top of your sheet of yellow paper/card trimming off the excess around the edges of the house.

The children's Nana bought these stickers for them last year from Accessorize but we never had time to do anything with them so this year they were perfect for this activity. You could use any stickers that are small enough to fit into the doors and windows though.


Let the littlies stick their spooky stickers inside all the doors and windows to their hearts' content!

Ta Dah! If you are lucky enough to have space for a display board for the children's work you could back it in a dark colour. We only had black backing paper left so to make the houses stand out I mounted them on to some orange sugar paper first. I used a starry border and have left space above the houses to add fireworks pictures as Guy Fawkes is fast approaching (watch this space!)


Monday 21 September 2015

Crochet hook roll tutorial


You will need:
Two fat quarters
Thread
Wadding
Ribbon (or a button and elastic)


1) Start by folding one fat quarter in half (whichever one you want to be the main part of the case)
 Cut one quarter of the length off. What is left will form the case. With a second fat quarter, cut two pockets. The first is half the height and half the width of a fat quarter. this is then folded in half as shown below (the left hand piece of checked fabric). The second is just a small rectangle again, folded in half (the right hand piece of checked fabric below). 
*Please note this is not the final position for the small square it was just placed there to show size


2) Fold the large pocket in half (right sides facing) and sew along one short edge.


 3) Check that the height of the small pocket is right for your darning needles. You want enough needle sticking out at the top to grab them when they're in the pockets (See left photo). If the pocket is too deep take a little off the height at this point before sewing. Then fold the small one in half (right sides facing) and sew around the 3 open edges leaving a gap to turn inside out (the gap is more visible in the photo on the right as I used more of a contrasting thread)


4) 
Open out the large fat quarter you are using as your main case. Place the first pocket in the bottom left corner with the stitched edge to the right, pin it in place.


5) Again, check the height is right for your crochet needles. If it's too tall just lower the pocket down the base fabric and leave some hanging off the bottom. you can trim this later once you've sewn along the bottom.


6) While your crochet hook is in place (as above) fold the top of the case over so that it encloses the top of the hook. This will prevent the hooks sliding out once complete. It may help to run the iron over the fold at this point so that you can see where it will be once you've removed the needle again.

7) Next place the small pocket towards the right of the base. With a darning needle in position, ensure that the top of the needle sits just below the fold you made before. If the pocket is too low down, the needles will slip out. Once this cushion is in the correct position, pin it to the main fabric (making sure you only pin it to the top layer not right through both).


8) Open up the base fabric again and stitch around the sides and bottom of the small pocket and down the sides of the large one - the bottom will be sealed when you sew the whole thing together (I know the left hand side would be too but if you do this now it helps with the next step!)


9) Then using the thickness of your hooks as a guide, sew lines down the large pouch at varying intervals to create the individual hook pouches. Then do the same with the small pocket using your darning needles as a guide. I've used the photo of a finished case below (which is a different case) just because you can see more clearly how I did these lines thanks to the contrasting thread!


10) Cut a piece of wadding to the same size as your  base fabric (once it's folded in half).


11) Loosely roll your main fabric and measure a piece of ribbon long enough to go around your rolled up hook case.


12) Fold your fat quarter in half so that the right sides are together (the pockets are on the inside with the small one to the right) Place the ribbon inside, folded in half with the fold lined up with the right-hand edge of the fabric. Where the fold is, pin the ribbon to the edge where my finger is pointing. You may want to tack this on by hand to make it easier when machine sewing the edge.


13) Keeping this orientation, lift the fabric and lay it onto the wadding that you cut before. Pin it and sew around the three open edges being careful to sew over the folded edge of the ribbon but not over any of the rest of the ribbon inside. Make sure you leave a gap to turn it the right way around. Trim off any excess wadding and fabric around the edges and trim the corners.


14) Here's the gap! (see my fingers?)  Turn everything the right way round, making sure you pull all the ribbon through. Then sew up the gap by hand. Fold the top down over where the needles would sit as before and iron it down again to give a need finish. Ta Dah!


True to form I forgot to take a photo of the finished roll but I do have a photo of one that I made with a button and loop which I will post at the bottom. I have included some instructions for this below too but you would need to use a much stiffer wadding for this method.

Most of the method is the same but just after step 7 (before you open up the base fabric to sew on the pockets) you will need to fold the left side of the case over about 3/4 of the way (as below) and sew a button on half way down the back in the centre of this folded section. The 1/4 on the right will later have the loop attached and will fold inwards to meet the button.


When you come to step 12 where you turn the piece inside out to put the ribbon on, instead place a piece of elastic (or a little hairband as I did!) tied in a loop so that the tied end is at the right hand side and the loop is in between the two sides of fabric. (In the photo I am showing the orientation but I will then slide the loop inside the fabric so it is sandwiched between the two sides. When I turn it the right side out the loop with then be on the outside. Also ignore the fact I've already sewn my edge!)


Ta dah!


I then filled mine with a basic set of hooks, a stitch diagram booklet and a crochet magazine...

...et voila! A lovely little gift for a crochet beginner!


I hope you have enjoyed this tutorial. Let me know if you like this sort of thing or what other things you would enjoy reading blogs about!

Thank you and hope you pop by again soon!

Elizabeth